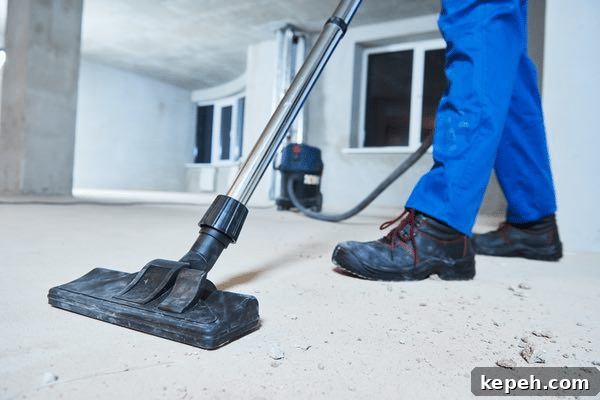
It’s time to bring new life to your living space with a renovation. Once construction ends and the dust settles, a focused post-renovation cleaning is essential to make your home comfortable, healthy, and ready to enjoy. Use a clear checklist, the right tools, and a systematic approach to transform the site into a spotless sanctuary.
Begin by dusting every surface from top to bottom, taking care not to miss ceiling fans, light fixtures, vents, and other hidden nooks that collect construction dust. Clean windows and frames inside and out to remove paint splatters and grime. Floors require special attention: vacuum or sweep first, then apply the appropriate deep-clean method for your flooring type—steam clean carpets, use manufacturer-recommended cleaners for hardwood, and scrub tiles and grout as needed.
Wipe down walls and other surfaces to remove adhesive residue, tape marks, and general dust. Finally, address indoor air quality by ventilating the space and using an air purifier or replacing HVAC filters to reduce airborne dust and spores.
Preparing for Post-Renovation Cleaning
Preparation saves time and ensures a thorough result. Follow these steps before you start deep cleaning:
- Remove debris: Clear loose construction materials such as nails, screws, and wood scraps. Sweep or vacuum to eliminate surface dust from floors, walls, and ceilings.
- Protect delicate items: Cover countertops, fixtures, and any newly installed pieces with drop cloths or plastic sheeting to avoid accidental damage during cleaning.
- Organize supplies: Gather brooms, mops, buckets, microfiber cloths, squeegees, HEPA-filter vacuums, and cleaning solutions suitable for your surfaces. Keep protective gear—gloves, masks, and eye protection—on hand.
- Create a cleaning plan: Work systematically from top to bottom and room to room. Divide the project into sections to ensure no area is overlooked.
Check any contractor recommendations for surface-specific care. If the job is extensive or involves delicate finishes, consider hiring professional post-renovation cleaners for specialized results.
Gathering necessary cleaning supplies
Prepare a tailored checklist of cleaning supplies: multipurpose cleaner, floor cleaner for specific materials, disinfectant, microfiber cloths, scrub brushes, squeegees, mop, buckets, HEPA vacuum, and personal protective equipment. Opt for eco-friendly products when possible, and ensure tools are in good condition to work efficiently.
Clearing out the workspace
Clear the area before cleaning with a simple five-step approach:
- Remove large items such as furniture and appliances to create working space.
- Sort smaller items—tools, supplies, and personal belongings—and discard what’s damaged or unnecessary.
- Pack fragile items securely and label boxes for easy unpacking.
- Organize storage spaces and discard expired or unused materials.
- Sweep or vacuum floors to remove loose debris before deep cleaning.
Wear protective gear while clearing the workspace to avoid injury from sharp objects or dust exposure.
Ensuring safety precautions
Safety is vital during post-renovation cleaning. Key precautions include:
- Cap exposed electrical outlets and secure loose wiring.
- Wear gloves, goggles, and masks to guard against dust and irritants.
- Store hazardous materials out of reach of children and pets.
- Keep walkways clear of trip hazards.
- Dispose of construction waste—sharp objects and chemicals—according to local regulations.
- Hire professional cleaners for tasks involving hazardous materials or complex systems.
Post Renovation Cleaning Checklist
A comprehensive checklist helps standardize the cleanup and ensures nothing is missed. Focus on these core steps:
- Deep cleaning: Dust all surfaces, clean walls, ceilings, and floors, and thoroughly clean windows, doors, and fixtures. Don’t forget vents and outlets.
- Sanitizing: Disinfect high-touch surfaces, kitchen and bathroom areas, and any surfaces where dust may harbor bacteria.
- Final touches: Mop floors, vacuum carpets, polish glass and mirrors, and organize the space so it’s ready for daily use.
Prioritize safety by using appropriate cleaners and protective gear. Consider professional services for delicate surfaces or large-scale cleanups.
Cleaning the floors
- Clear debris, sweep or vacuum thoroughly.
- Choose a cleaning solution appropriate for your floor type—mild detergent for wood, dedicated tile cleaner for tiles, and steam for carpets.
- Mop or steam-clean in straight lines and allow floors to dry completely before walking on them.
- Use separate tools for different rooms to prevent cross-contamination and place doormats to reduce dirt tracking.
Wiping down surfaces
Wipe all surfaces with suitable cleaners and microfiber cloths. Match cleaners to materials—gentle soap for painted walls, disinfectants for high-touch areas, and specialty cleaners for stone or stainless steel. Work methodically and remember hidden spots like baseboards, trim, and cabinet interiors.
Removing dust and debris
- Use microfiber cloths or dusters to trap particles.
- Vacuum upholstery and carpets using attachments for crevices.
- Sweep or damp-mop hard floors.
- Clean vents and filters regularly to prevent recontamination.
- Empty and maintain vacuum bags and canisters after use.
Cleaning windows and mirrors
- Wipe with a lint-free or microfiber cloth, working top to bottom.
- Use a water-and-vinegar mix or a streak-free cleaner for glass.
- Clean frames, sills, and screens separately and allow to dry before reinstalling screens.
Sanitizing the bathroom
- Gather disinfectants, toilet cleaner, scrub brushes, and gloves.
- Clean toilet, sink, faucet, and countertops thoroughly.
- Scrub showers or tubs and remove soap scum from tiles and grout.
- Wipe mirrors and fixtures, then sweep and mop the floor.
- Replace towels and empty trash; sanitize accessories like toothbrush holders.
Cleaning the kitchen area
- Clear and disinfect countertops and food prep areas.
- Clean and polish sinks and faucets.
- Wipe down appliances, degrease oven and stovetop, and clean cabinet fronts and handles.
- Maintain regular cleaning practices to keep the space hygienic and functional.
Removing paint splatters or stains
Identify the paint type before treating stains. For water-based paints, use warm soapy water and a soft cloth. For oil-based paints, use an appropriate solvent sparingly and test on an inconspicuous area first. Gently scrape dried paint with a plastic putty knife to avoid surface damage.
Deep Cleaning Specific Areas
Targeted deep cleaning ensures every space is safe and presentable:
- Kitchen: degrease appliances, clean behind and under units, and sanitize countertops and backsplashes.
- Bathroom: deep scrub tiles, grout, fixtures, and drains; disinfect thoroughly.
- Floors: steam-clean carpets, deep-clean hard floors, and treat grout lines.
- Walls and ceilings: dust and wash marked areas with a mild detergent.
Deep cleaning carpets or rugs
- Remove furniture, vacuum thoroughly, and pre-treat stains.
- Use a steam cleaner or hire professionals for best results.
- Allow carpets to dry completely before returning furniture.
Scrubbing tiles and grout
- Sweep or vacuum first, then apply a tile cleaner or mild detergent.
- Scrub grout lines with a grout brush and rinse well.
- Use baking soda and vinegar for stubborn grout stains, then rinse and dry.
Cleaning air ducts and vents
Clean ducts and vents to improve air quality and HVAC efficiency. Remove dust and debris, check for mold, replace filters, and consider professional duct cleaning when necessary to reach deep or difficult areas.
Removing any residual construction dust
- Use a HEPA-filter vacuum and microfiber cloths to capture fine dust.
- Wipe surfaces with damp cloths and a gentle detergent solution.
- Mop floors carefully and ventilate while cleaning; run an air purifier to catch airborne particles.
Final Touches
The final touches bring a renovated space to life. Polish fixtures, buff surfaces, and arrange furniture thoughtfully. Add textiles, rugs, plants, and decor elements to personalize the space while maintaining functionality.
Polishing surfaces
Choose appropriate polish or protective coatings for wood, metal, stone, and glass. Follow manufacturer recommendations and apply finishes carefully to enhance appearance and durability.
Organizing and arranging furniture
- Measure the room and consider traffic flow.
- Create functional zones and avoid overcrowding.
- Add final decorative elements—rugs, curtains, cushions—to complete the look.
Adding personal touches
Personalize your renovated space with artwork, photos, lighting choices, and accessories that reflect your style. These finishing details make the space welcoming and uniquely yours without compromising the clean, polished result of the renovation.
Conclusion
Post-renovation cleaning completes the transformation of your home. Follow a methodical top-to-bottom approach, use the right tools and cleaners for each surface, prioritize safety, and consider professional help for specialized tasks. With careful preparation and attention to detail, you’ll restore air quality, protect your new finishes, and reveal the full potential of your renovated space.
- Remove dust and debris, then clean surfaces thoroughly.
- Deep-clean high-touch and high-traffic areas.
- Service HVAC filters and consider duct cleaning to improve air quality.
- Check safety systems and electrical outlets before regular use.
- Finish with polishing, arranging furniture, and adding personal touches for a comfortable, ready-to-use home.